Kp moulding and casting techniques
Have recorded this one in a little more detail as it's slightly different from simple one or two-piece moulding and casting.
When building any master think spatially about how it will be moulded and how to release the master, and how the casts will be de-moulded - all without damage. Think about how much detail you can add to the master without creating "undercuts" and resulting in that detail being torn and ripped during demoulding. The Kp body leant itself toward a three-part mould - two longditudinal halves and a bottom. The two halves will split along the middle of the roof and ends, and should enable the two halves to slide apart without catching on any "under-cuts" to release the cast. The bottom is not really necessary but making the body (mostly) hollow will save on resin. A smaller scale like NZ120 you'd probably do without the third part and end up with a solid body. With the Kp you can add all the detail to the body EXCEPT handrails, door handles and the like, as well as the bottom door runners and the upper door runner "sides". All these bits would trap the master in the mould if added now, but can be qickly and easily be added to the casts.
Setting up the mould A challenge to our spatial awareness. Remember this was going to be a three-piece - two longditudinal halves that will part sideways, and a bottom/lid. A little more complicated than just a two-part. And probably not the right way to do it but was logical to me. First up grab a small sheet of glass (e.g. ex- 7" x 5" photo frame) and seal the Kp body master right-way-up, to the middle using a thin smear of platicine and carefully cleaning off any exposed excess. As a guide, mark a longtidudinal centre-line in pencil on the roof of the master. Next is the boxing that will contain the silicone material for the longtidudinal halves of the mould. From scrap plastic sheet (I used some spare 1.5mm ABS), create two "canopies" that each have two ends 50mm high and 45mm wide, and a roof 125mm long and 45mm wide, meaning it's at least a centimeter higher, and longer than the body at each end, and wide enough to extend from the body centre-line to at least a centimeter past the body sides. The two canopies will form two halves of a larger canopy, with a divider centred on the centreline of the master. Once they have set, one canopy is put (not glued yet) in place, lined up on the body's centreline, and the gap between the canopy and body at the centre-line (top and ends) is carefully measured. Scrap plastic sheet pieces cut to fit are then PVA glued to the edge and inside of the canopy, and will form a partition that will be at the join of the two mould halves.
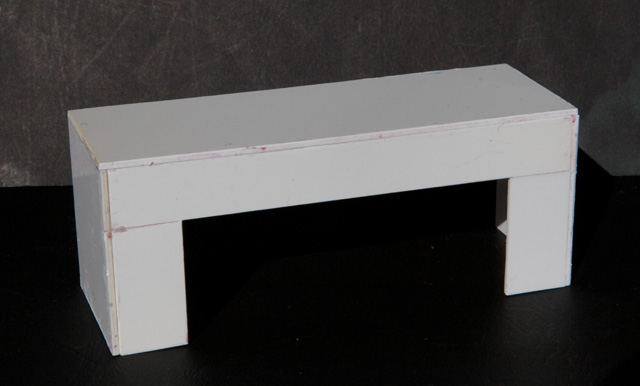
Once all the glue has set for the canopies and partition bits, test fit the canopy with the partition against the master and glass sheet and make sure all is snug. Use PVA glue (it's only going to be temporary) to stick ONLY the canopy with partition to the glass sheet, so it covers half the Kp body down the center-line. No glueing to the master! Just to the glass. Once the PVA has dried, any partition-to-body gaps - mainly the corrugations in the ends - are carefully filled with plasticine and all trimmed and cleaned up as best as possible on the outside of the partition, the side that has the body sticking out. Don't worry about the inside of the partition at this stage. Next the other "canopy" is glued in place, to the glass and the other canopy edge, only using PVA because it will be temporary. This is the side that will get filled with the first pour. Finally add some "keys" from short stubs of plastic sprue, that have been rounded off one end and are flat the other. These lumps will create holes in the mould and matching knobs when the other half of the mould is poured. "Keys" are required to accurately line up both the halves and the lid of the mould when assembling for a cast. We have one at each end and two above the roof to key the logditudinal halves, while there is one at each end for the bottom lid.
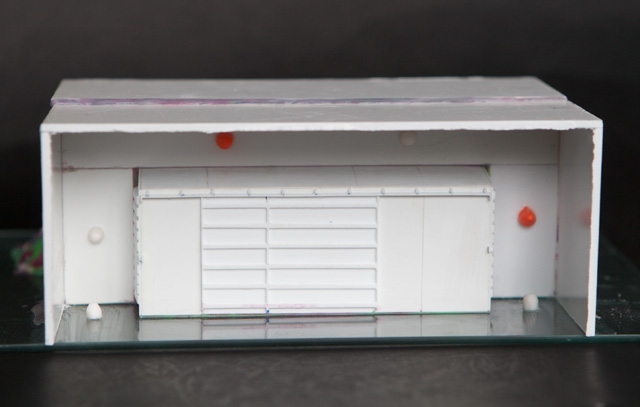 The canopy with partition is at the rear, while the other canopy is fixed in front. Note the gaps filled with plastacine, and the keys' positions that will allow accurate mould assembly for casting. The whole construction is then tipped up 90 degrees and supported (I used plastacine pillars!) and filled with silicone and left to set. Once the silicone has set the partition canopy is removed from the rear and all plastacine fillings removed. We now have half a mould.
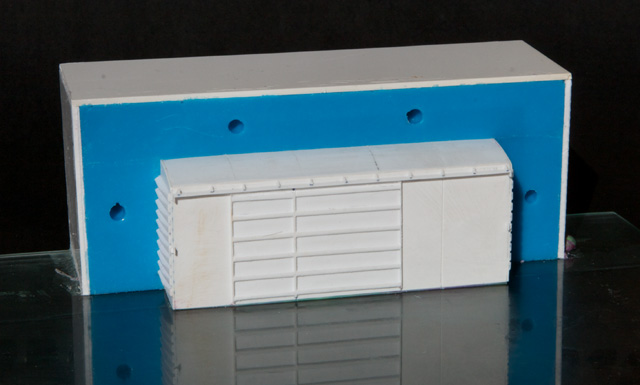 You can see the holes made by the keys that were glued to the partition.
Next the partition canopy has its partition pieces removed, and using PVA glue, the remainder of the canopy is stuck back in place to become the boxing for the second pour. Two more "keys" - one each end are stuck to the glass for the future bottom/lid mould.
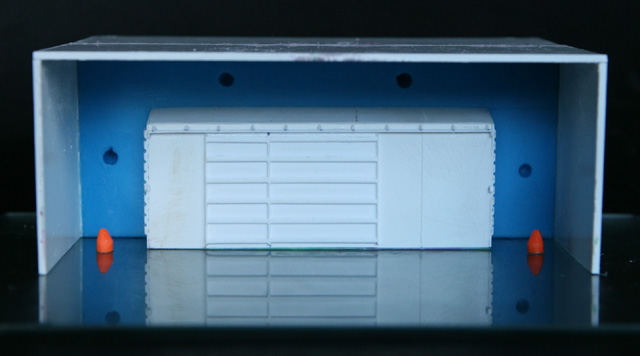 Note the keys for the future bottom/lid, and the exposed surface of silicone has been coated with a thin layer of Vaseline.
Silicone sticks to nothing EXCEPT ITSELF! Before pouring the second half (and I nealy forgot!) you must spray or coat any exposed silicone surface that will come into contact with the new pour, with some form of mould release substance. I just used warmed up Vaseline applied VERY sparingly with an old paint brush. You only need a very very thin layer. On the subject of mould release substances, with the two products used - Ultrasil silicone and ProCast Resin - I've never had any problem with either releasing the silicone from any boxing or master when making moulds, or releasing the resin from any mould. Great Stuff and highly recommended. BUT just have to remember to use Vaseline on joins when creating any multi-part moulds! Again the whole construction is tipped up 90 degrees and filled with silicone and left to set. Once set, the glass sheet can be removed from the bottom.
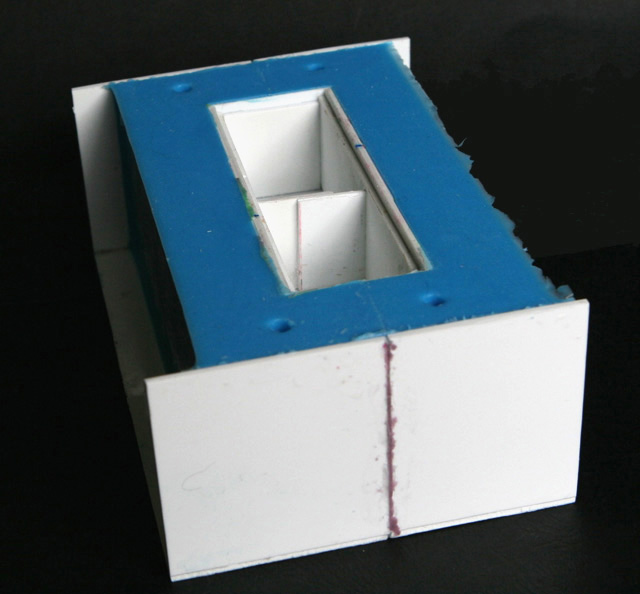 At this stage you could remove all the boxing, split the mould halves, remove the master, put the moulds back together and begin casting. BUT the body would end up solid and a waste of resin. The main purpose of the third part of the mould is to make the body hollow, except for the strengthening divider. So some thick plastic card is glued to the bottom edges of the 1st and 2nd half moulds' boxing, to form boxing around the bottom. Some plastic rod lengths (from old kitset sprue for example or I used kebab skewers - it was what was close to hand!) are glued to the bottom edges of the master to form breather holes when time comes for filling with resin. Just make sure they are tall enough to be above the proposed level of the silicone. Note the middle vent hole is a bit thicker - this will allow pouring in any extra resin if needed. 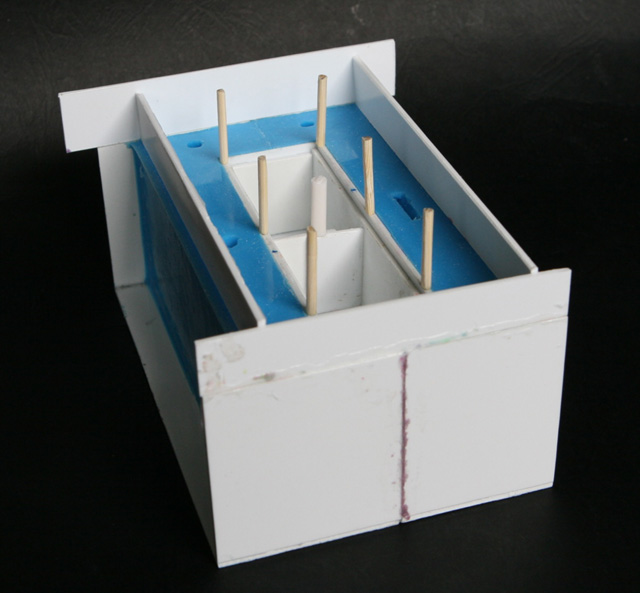 These should have been added as per the others. A slight oversight fixed with a scalpel!
Tip - One trick I use to work out how much silicone is required is to fill with water first then tip that out and measure by weight. Allow plenty of time for the water to completely dry out of the master and boxing before pouring silicone though!
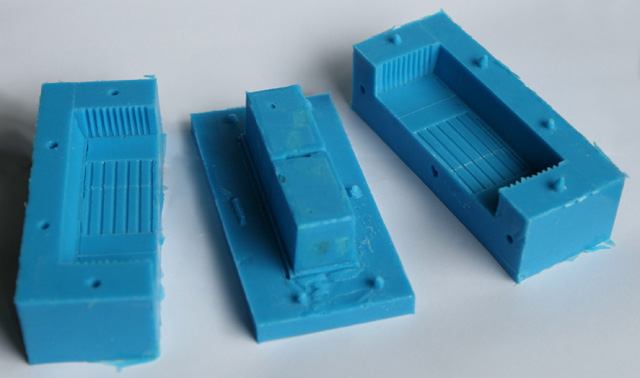
Even after all the planning, I was still a little worried how it would all work. e.g. so many bubble traps, and would the fine door-runner parts survive de-moulding? First, as with any casting, work out how much resin to mix. Assembling then filling the mould with water gives an idea. In my case it turned out to be approx 50g. After mopping out any remaining moisture the mould is left a few days to completely dry out. To make removal of the mould lid a whole lot easier, the "hollowing plugs" were smeared with vaseline. Tip:- Used a technique I call "toothpicking" to help lessen the chance of air bubbles. . . Before filling the mould with resin, pour just enough resin to cover bubble-trap areas and then using a toothpick, gently but quickly prod and poke the resin so it gets in all the nooks and crannies - everywhere. With the Kp mould halves still apart, I was able to toothpick resin into the thin door-end and divider strips, door-stops, top door runners (including the end caps), and each and every angle bracket. The ProCast Resin stays nice and runny for about five minutes before starting to thicken and that gives just enough time for toothpicking before quickly putting the mould halves together, pouring in the remainder of the resin, and fitting the top mould part. Then some gentle squshing and tapping before the resin is left to set for about an hour or two.
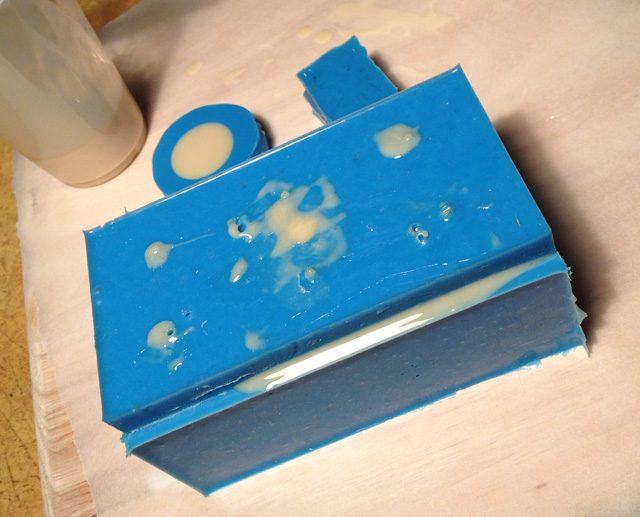 moulds handy to take any excess mix - in this case for a Uc tanker tank end, and a four-wheel wagon brake cylinder.
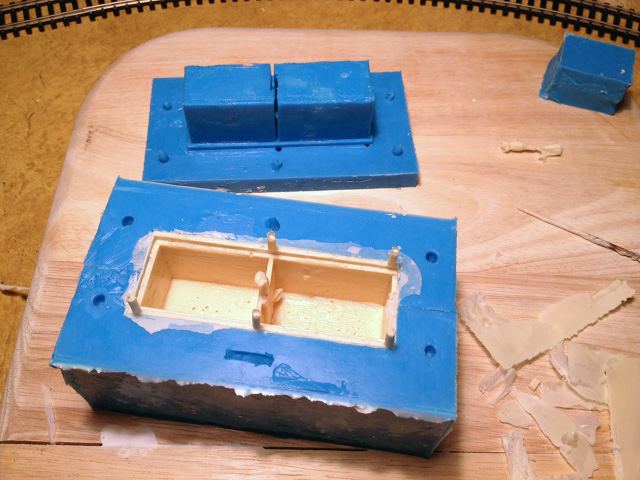 and the whole thing eased out and vent sprues can be carefully cut off.
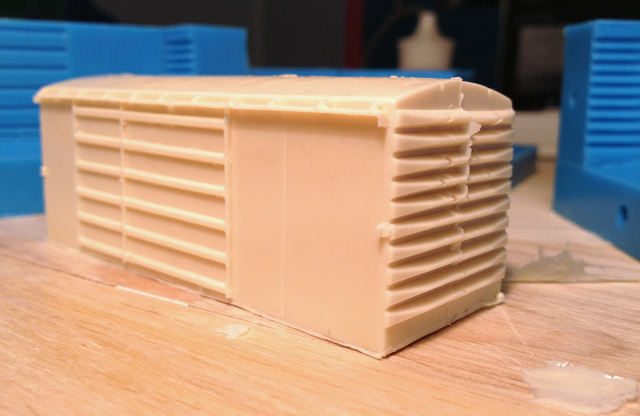 one freshly cast Kp wagon. Note the airbubbles in the corrugations. 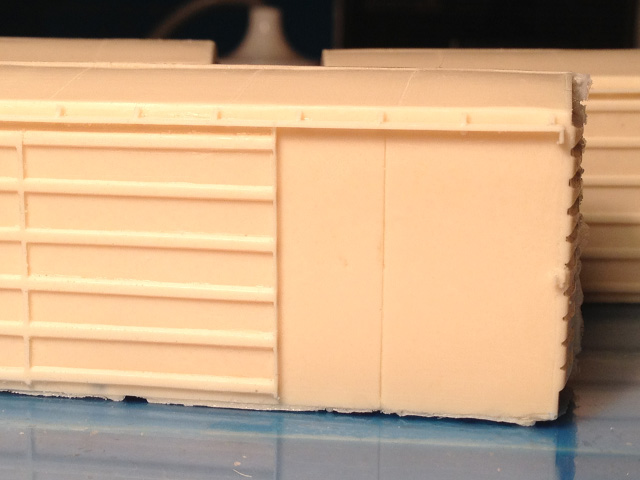 and was really pleased with how the fine parts came out - like the door-ends, stops, runners, and angle brackets.
 after which they'll be ready for a floor, chassis, and further detailing. It seemed no matter how much toothpicking, subsequent casts still showed bubble problems with the end corrugations so will just have to be content with some good old Tamiya putty work - excellent stuff BTW. Some imperfections, such as the odd ding in the sides are welcome though as they add a bit "battle damage" to the bodies' finish and can even be highlighted when it comes to weathering.
Conclusions First attempt at a complete body cast a little scary but happy with results. A kitset (moulded/cast ends, sides, and roof) similar to my Kc build (and the way Phol Rzoska describes his 9mm Kp builds in New Zealand Model Railway Journal October 1987) may have been easier, I don't know but it is nice to get a complete body shape in one hit!
The budget Eight Kp bodies from 400g of resin works out about $4.70 per body (2013 NZ prices). If you count the Silicone for the mould, that adds another $6 or so per body BUT. . . . that mould has only produced these eight bodies, and has potential to do another 30 at least. That will drop that additional $6 per body down to only an additional $1.20 per body. The more you cast from a mould the cheaper unit cost.
Home |