Kc-1 box vansThese look fairly straight forward using pre-scribed plastic sheet and pre-cut strips from Evergreen or Plastruct. Procedure is very similar to my Xc ventilated van. They share same dimensions, wooden cladding, and door styles.
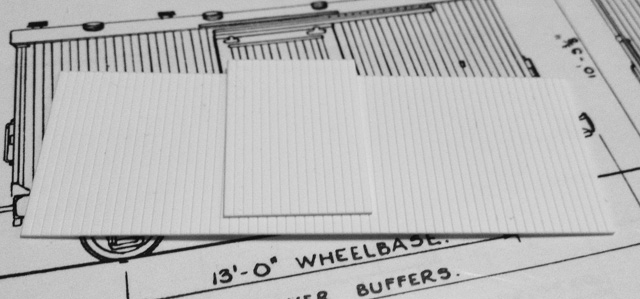
The parts Using a re-scaled version of the NZRLS drawing for Xc (yep, Xc), the Kc sides, ends, and doors are carefully measured and cut from .020" thick, .050" groove spacing, Evergreen V-groove sheet styrene. Remember the Kc is externally, basically an Xc without all the venting gubbins.
The best reference photo I found was the NZR Publicty one of Kc913 in Fred Lee's excellent New Zealand Railways Freight Rolling Stock Plan Book Volume One. Another great photo for when it comes to the exterior end bracing, is of Kc904 on the New Zealand Rolling Stock register site. And while looking at these photos and trying to work out how to do the door top hanger brackets and latch, I remembered ages ago buying some Tichy #3068 strap hinges. They match almost perfectly after being trimmed for length.
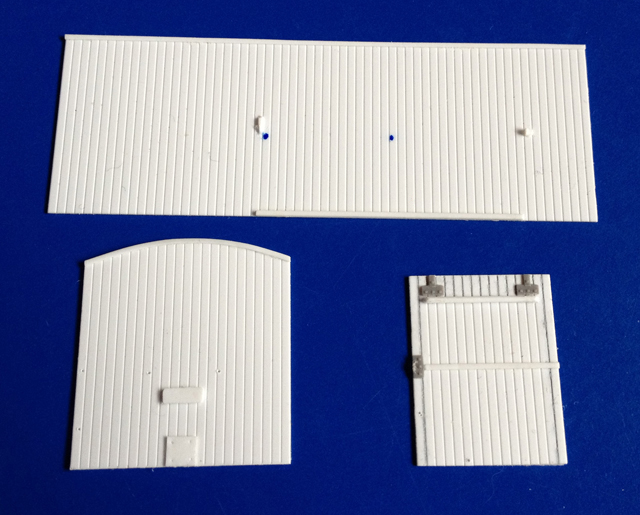
In the photo above you can see how the door has been detailed by filling relevant grooves, and using the Tichy hinge parts and other plastic strip. The side has a top trim strip and a bottom door rail added, along with door stop and latch, while the end has a top trim strip, and a couple of plates as per reference material. Notice also on the end and door, dimples to mark drilling points for handrails. These save a lot of time when it comes to final detailing. In my case these three bits were then stuck to a glass sheet with a very small amount of PVA glue, surrounded by a Plasticine fence, and filled with silicon to create a one-piece mould.
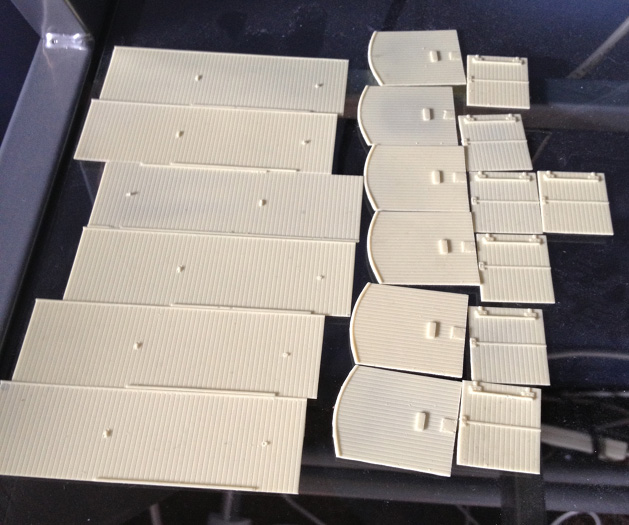
 The castings came out crispy clean and the only disappointment was the door part which needs further filling in the v-grooves of the top part and sides. You really do have to spend time getting the masters just so. For my modelling era, these Kcs would have had externally braced ends, but this will be done on the casts when building the model because the master will be used to create an Xc master end. Most Xcs had internal end bracing.
Assembly To get everything square when assembling the four sides, I used a sheet of photo-frame glass and an extruded aluminium modelling mitre box. Another method that can be used is simply glue all the bits to a carefully measured "floor" made from plastic or brass) sheet. Or in my case, I also tried one of the cast 21ft chassis floors that was been shortened by 4mm (one scale foot). Tip - Once set, strips of thick ABS were glued on edge, around the insides about halfway up from the floor to provide added strength.

The roof was a bit tricker than first thought. To get the correct size a piece of stiffish paper was cut out and fitted and trimmed until it looked right. Then this was used as a template to cut out rectangles of 0.5mm (0.020") plastic sheet. Each roof piece was then curved by gently wrapping around a broom handle until the correct radius was obtained and it sat perfectly in place. This made for easier glueing and meant no stress for it to try and ping off in time.  along with details such as the door's top runner, and body corner straps. 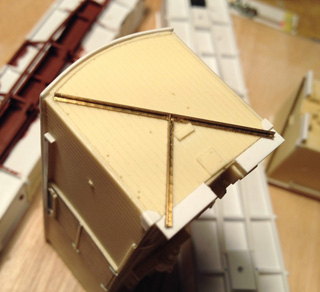 Note the drill holes for handrails. 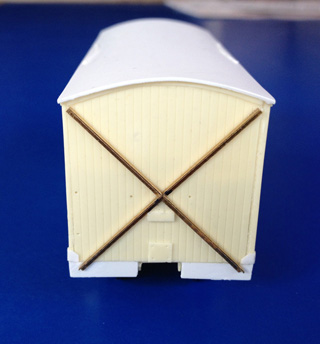 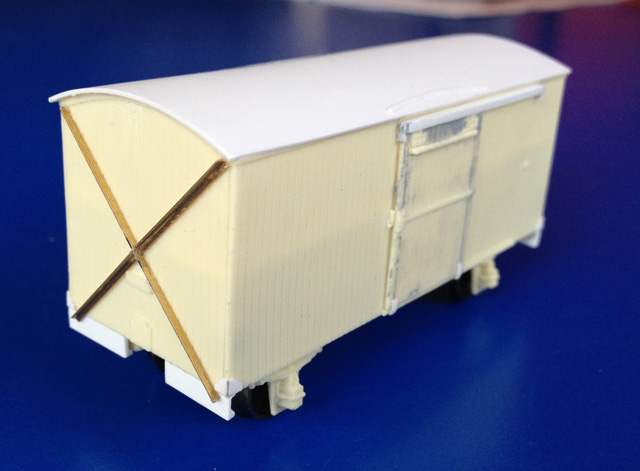
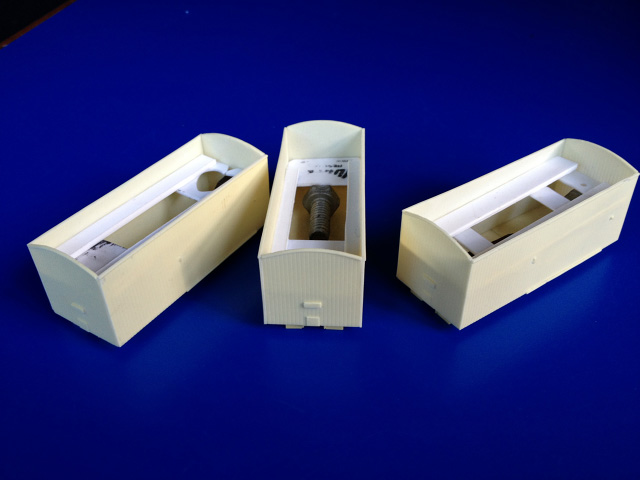 Note the use of interior strengthening strips, and old bolts for weight.
 Humbrol black with a bit of whitewash for the roof and undergubbins.  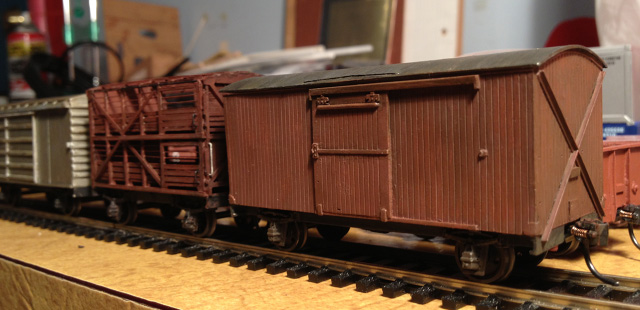   Time to add some handrails, brake levers, shunters' steps, and some decals. More to come. . .
References
|