Build your own wagon chassis - 4-wheel Mk II
Also there was the need for variable floor and solebar sizes, the ability to produce 10ft or 13ft, or even 8ft 6" or 9ft wheel base chassis and floors for different body lengths. I really liked the idea of using a cast chassis floor as a jig only - that worked really well for the J5 chassis build. So if masters of four axleboxes were made, and a mould made of those, then a whole wagon's worth could be cast at once. Then construct a jig where quick and easy solebars could be produced using the axlebox castings and plastic strip, for the size of body and wheelbase chassis required.
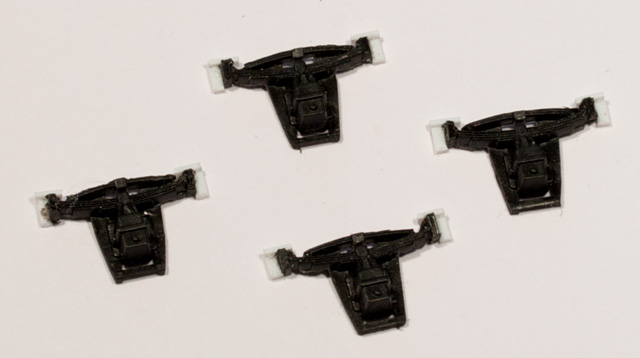
So that's the idea, here we go. . . Four sets of leaf springs, trimmed down, are stolen from another kit's axleboxes to be used as the upper springs on each of the new axleboxes. Small bits of plastic strip are added at various angles to get the look of the spring mountings. All to get the look. 
To speed up production, two, two-part moulds were made so two wagons-worth of axle boxes could be cast in one "batch".

The axle holes were cleaned out and deepened slightly with a 2mm drill to take the brass top hat bearings later in the process.
That's the axleboxes, now for the jigs.
. .
 solebar construction jig, and 13 ft chassis building guide.
Referring to the photo above, the solebar jig consists of two strips of 0.5mm thick plastic, 3mm apart, glued to a sheet of glass. The "cut-outs" are to avoid any glue from the axleboxes getting onto the jig parts. On the lower of the two strips there are appropriately and accurately positioned locating lugs for 10ft or 13ft spaced axleboxes. Should fit short stub axles to further increase accuracy of alignment. In operation, a strip of 3mm wide 0.5mm thick plastic (could use brass) is laid into the slot and two axlebox castings positioned using the guides and spot superglued. After removal from the jig, the axleboxes receive more superglue or epoxy glue for strength. Then the thin solebar is reinforced by a thicker layer of 1mm plastic (or brass) strips on the inside, leaving gaps for wheel clearance at the axlebox positions. Was thinking of doing a jig for this too but in practise it seems to be just as easy without.
 Notice the thicker inside strips added, with gaps for wheel clearance   Wheels are North Yard 10.5mm plain on 25mm axles, HO/OO gauge.

|