Uc tanker wagons
I love the look of those old-school Uc-1, Uc-2, and Uc-3 wagons,
with all their busy strapping and trussing. And some of them
had colourful paint schemes as well. Just look at this beautiful
Uc-2, purportedly in chrome-yellow and black. . . (click on the
the image or link below for origin, and access to a larger sized
image). . . this one is my most favourite goods wagons of all
time.
%20640.jpg) IMHO the best looking
freight wagon ever built - Shell oil tank car "Uc"
1031.
IMHO the best looking
freight wagon ever built - Shell oil tank car "Uc"
1031.
Godber, Albert Percy, 1875-1949 :Collection of albums, prints
and negatives.
Ref: APG-2007-1/2-G. Alexander Turnbull Library, Wellington,
New Zealand.
http://natlib.govt.nz/records/23038480
The later Uc-15 style (Europa example at top of the page)
looks to be a much easier build though!
Uc-1 and Uc-2 classes
Using the article in Railroad Model Craftsmen magazine July 2009
on building tankers as a basis, tanks were constructed using
25mm wooden broom handles cut to length rather than plastic pipe
as suggested - was just what was to hand at the time!
The method involves adding layers of 0.005" plastic until
correct diameters and design are reached. Superglue was used
to add the layers for fear of distorting the thin sheet if using
any solvent-based glue.
Finished off by using polystyrene cement though, sparingly
on the joints that end up on the underside, out of sight.
The tank cradles were made from plastic strip, and to get
consistency a jig was made from plastic strip to firmly hold
the number required in a sandwich. Then use a piece of 25mm wooden
broom handle wrapped in sandpaper to form the correct concave
curve.
 Cradle-making jig gives
an even curve to all cradles.
Cradle-making jig gives
an even curve to all cradles.
The end supports are built up from plastic strip and angle
and channel as per drawings and reference material. Again, commercially
available plastic strip material makes the whole job easier than
you think. Just be super accurate with your measuring.
Before the channel-section parts were glued in place they
were squared up and thinned out a bit in the inside of the channel,
ready to accommodate thick strips of "wood" that will
help support the tank ends. Again, see reference material.
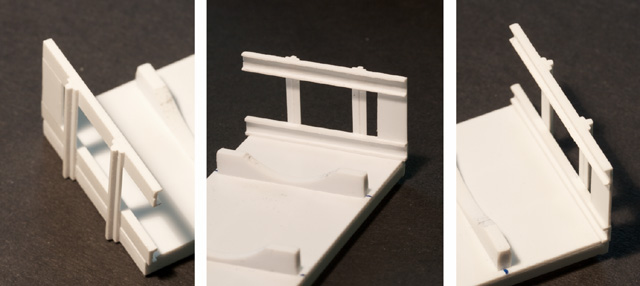 Detail of the tank end
supports.
Detail of the tank end
supports.
Maybe should have used brass angle for a finer look on the vertical
supports?
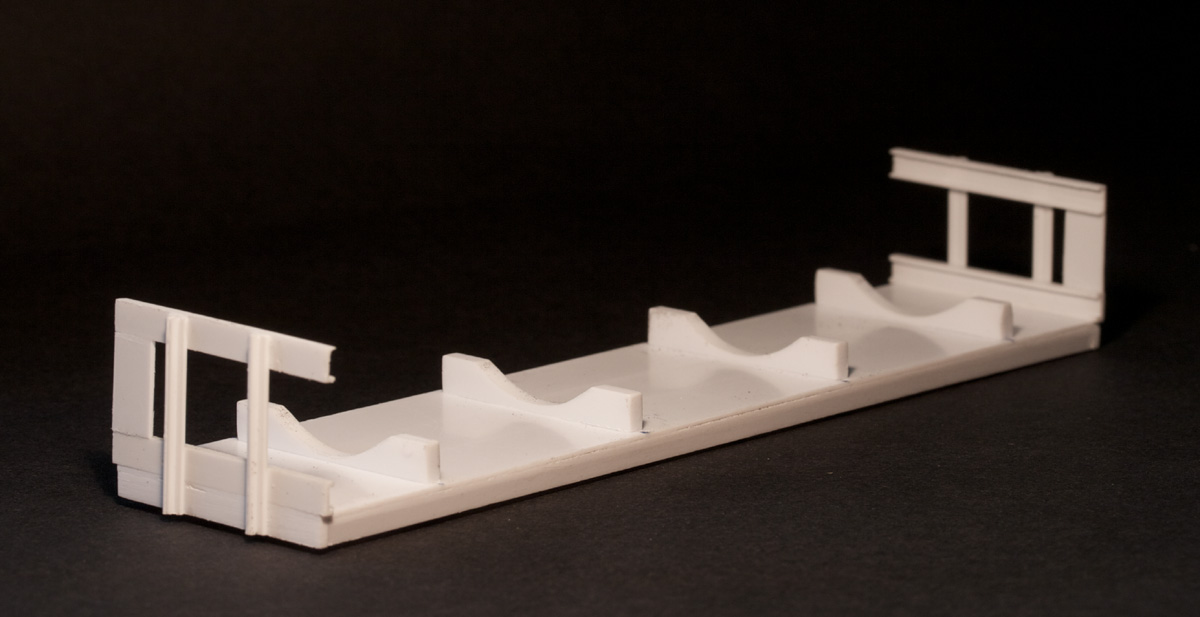
 Tank end supports and
cradles all glued to an Ozzie 30ft chassis
Tank end supports and
cradles all glued to an Ozzie 30ft chassis
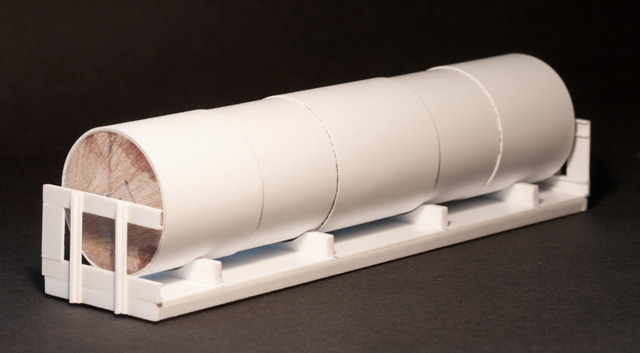 Now with the layered
tank sitting in place
Now with the layered
tank sitting in place
The domes are built from appropriate size tube and a plastic
card cap is added on one end before again using the tank wrapped
in sandpaper to get the curvature right for the dome bottom.
 Tanker domes from tube,
and shaped.
Tanker domes from tube,
and shaped.
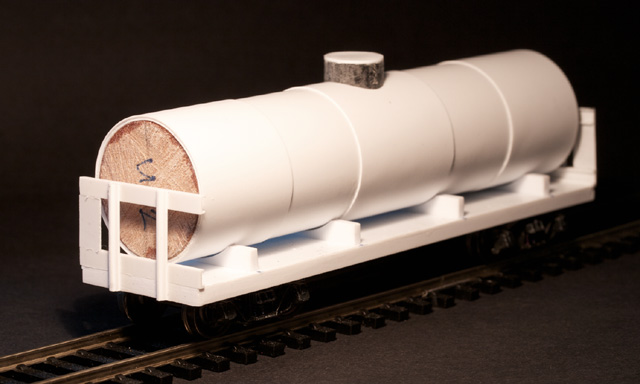 And here's the dome test-sitting
in place, and all on bogies (slightly crookedly!) to see how
it looks.
And here's the dome test-sitting
in place, and all on bogies (slightly crookedly!) to see how
it looks.
Coupler cutouts have been left until later.
For the tank ends it may have been easier to round off the
ends of the broom handle lengths but decided to make plastic
ones from old (Frateschi - what I had to hand) tanker ends thinned
down to correct thickness. Will use one as a master and mould
and cast the number required for consistency.
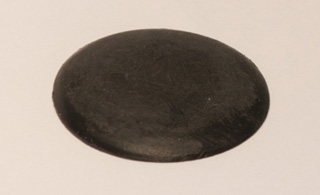 Tanker end master ready
for moulding and casting consistent size and shape parts. . .
Tanker end master ready
for moulding and casting consistent size and shape parts. . .
 . . .and the resuting
one-piece mould and casts. Mmmm. . . chocolate.
. . .and the resuting
one-piece mould and casts. Mmmm. . . chocolate.
More detail to follow. . .
Uc4
More to follow. . . including these.
Uc-15 and Uc-16 classes
More to come. . .
Uct Bulk Tallow tanker
More to come. . .
Uc-what?
A slight diversion here, another distraction. A "bash"
possibility, an old Tri-ang bogie tanker.
Home |