U-2 class bogie flat wagon from a Frateschi flat-car kitBought some of these a while back with a view to using their bogies on other projects, but then didn't want to waste the decks - they looked so nice. Then some U-2 class reference photos appeared on Facebook page RailNZ Prototype Library "U-? class" photo album and that was it I was sold.. . . . The Frateschi flat-car kit is really just a CKD (completely knocked down) and consists of the main body, bogies with wheels, stakes, and trusses.
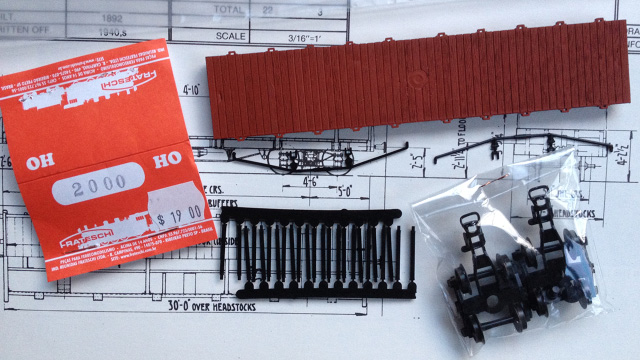
What needs doing then? The width of the actual deck is 3.5mm too wide, and 40mm too long. Needs end boards. Like most overseas stock, the chassis is riding way too high for us, so needs lowering. Stake pockets need removing and replaced with correct number - six per side, and correct spacing. The stakes themselves if you want to use them are spot on for a scale thickness 4 inches (1.3mm) but way too tall. Trussing - rods are way too thick, the turnbuckles are solid, and the queenposts not quite right. Bogie mount points are too far inboard and need moving to a scale 5 feet (20mm) from the ends. Supplied bogies are the closest I've seen yet to our old NZGR drawing 3181 freight bogie, and pretty close to OO scale, being only 1mm too long in the wheel centres. Not bad. But note that the original U class had slightly different looking type 97 bogies if you wanted to be 100% correct. Wheels need changing to spoked type. And don't forget the usual NZGR details - hand-brake lever and ratchet, shunters' steps, and handrails.
Re-construction

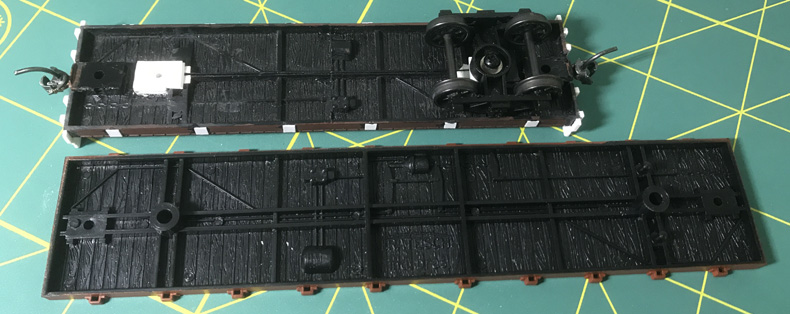
The bogie mounts were first cut off flush to the rest of the underframe chassis members. The coupler pads, and centre sills from the bogie mount points to the headstocks were then trimmed down flush to the underfloor to allow later fitting of a coupler box, new bogie mount point, and give bogie frame and wheel clearance. All the stake pockets were trimmed off and the sides filed smooth. The body was shortened by removing a section from the middle - fortunate as the middle section of the decking has a horrible giant sprue mark dead centre, spoiling the nice overall wooden plank effect. Carefully planned cuts meant the planks matched up when the halves were joined back together. That is, the cuts just happened to be on half a plank. Another two cuts with a razor saw removed the longways 3mm or so centre section between the centre sills. With the deck now in four sections, they were dry fitted back together, and with the odd bit of tidyup with a flat file, were glued back together using normal polystyrene cement. The assembly was then sandwiched between two sheets of glass from photo frames with some weight on top and left to set for few days after which the joint was cleaned up with a touch of the nail file.
 Next the bogie mounting holes needed moving closer to the ends - a scale 5ft, or 20mm from each end in OO scale. This was done by fitting a pad of scrap plastic, drilled and tapped for a Kadee bogie screw or just drilled to take a stubby self tapper. I have stockpiled some made up bogie mount pads ready for other bogie wagon projects so just grabbed a couple of those. If the hole in the bogie is too big for the screw head, just add a washer or even glue one in place to effectively make the hole smaller. The Frateschi bogie mount couplers were cut off , along with the lugs on the bogies' top surfaces.

These bogie wheels were of an odd axle-length - 24mm, which meant replacement wheels were difficult, most being 25mm or 26mm. North Yard can supply 23.8mm but they proved ever so slightly loose. Too loose for comfort.. So I tried a quick and dirty fix, using a 1.5mm drill bit to ever so slightly deepen each hole. This resulted in nice fitting and running 25mm North Yard spoked wheels.
 Looking very much like our drawing 3181 being more "flat bottomed" than the Kadee Archbar type. Couplers were then added - currently my supply is Kadee No5 boxes and No 48 whisker couplers so the boxes were simply assembled and glued in place. Coupler height as anticipated was pretty much spot on so no packing required Various small chunks of lead from whatever source was to hand - usually lead sinkers or dentist X-Ray film packaging - was added wherever could be. Next some cosmetics. On the sides of the deck, a line was scribed 3mm up from the bottom, and the top plank grooves were "extended" down to that line using a scriber, to better represent the side view of the deck planking.
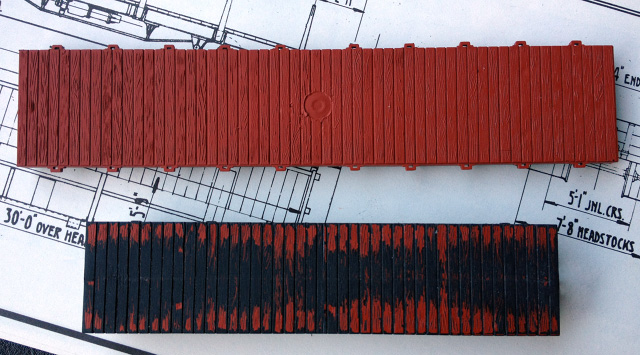
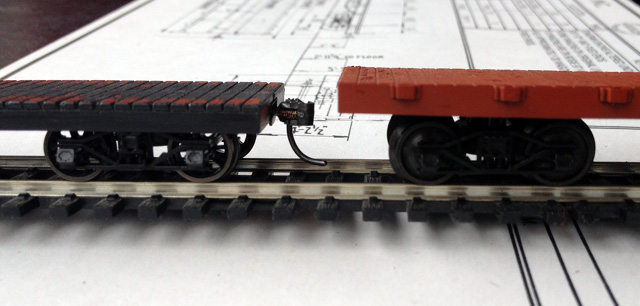
 ride height and decks compared to the origin model
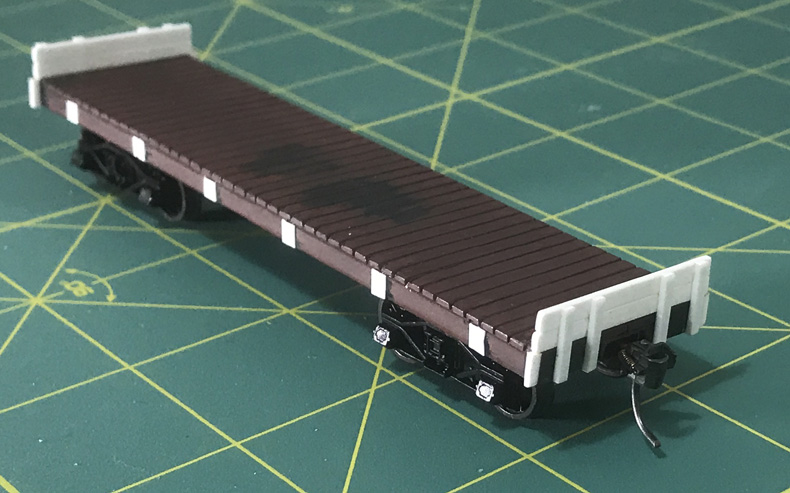
Now for the ends Next the ends were created from strips of styrene - two planks and four vertical supports for each end. The planks are slightly bevelled on all edges to help with the overall look of the real thing. I've also 'extended' the headstock slightly to look like the prototype by using bits of strip styrene.
Now with both ends fitted, and using the scale drawing as a guide, I've added thin squares of styrene to represent the back of the stake pockets.
along with the removal of bogie bolsters and bogie mount point, and the fitting of Kadee coupler and new bogie mount point.
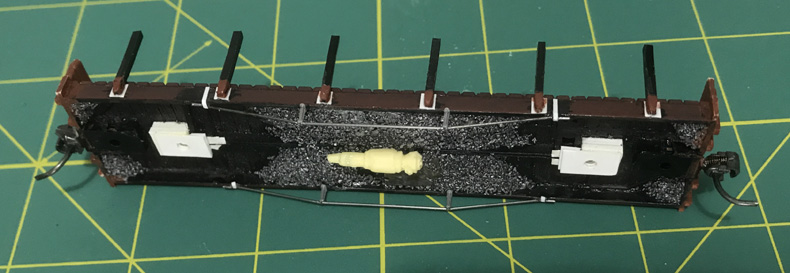
Time for some undergubbins Added weight using chunks and grated (rasp filings) of lead liberally doused in superglue. One of my resin cast brake cylinders is then glued in place. The stakes are shortened and shaped originals from the Frateschi kit, with painted tips to represent the pockets, which are then stuck to their backing plates. This method to me looks less chunky in this scale, and more like in some prototype reference pics I have seen. Tichy parts queenposts provide support for some wire lengths for the truss rods. The ends of the rods are held in place by tiny styrene straps.
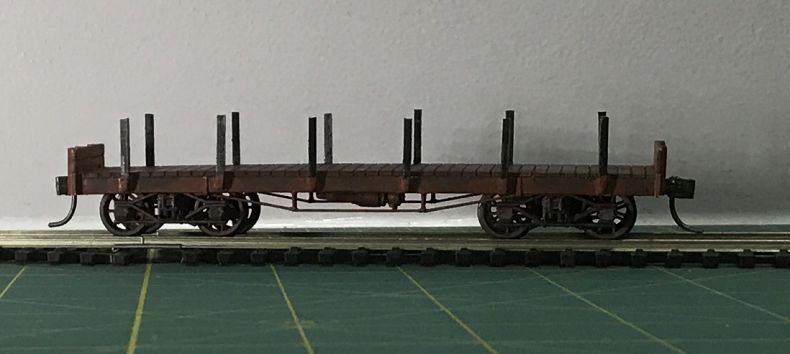
With the stakes all added, splashed about some dirty browns so it's just about ready for final details and lettering
References
More to follow.
|