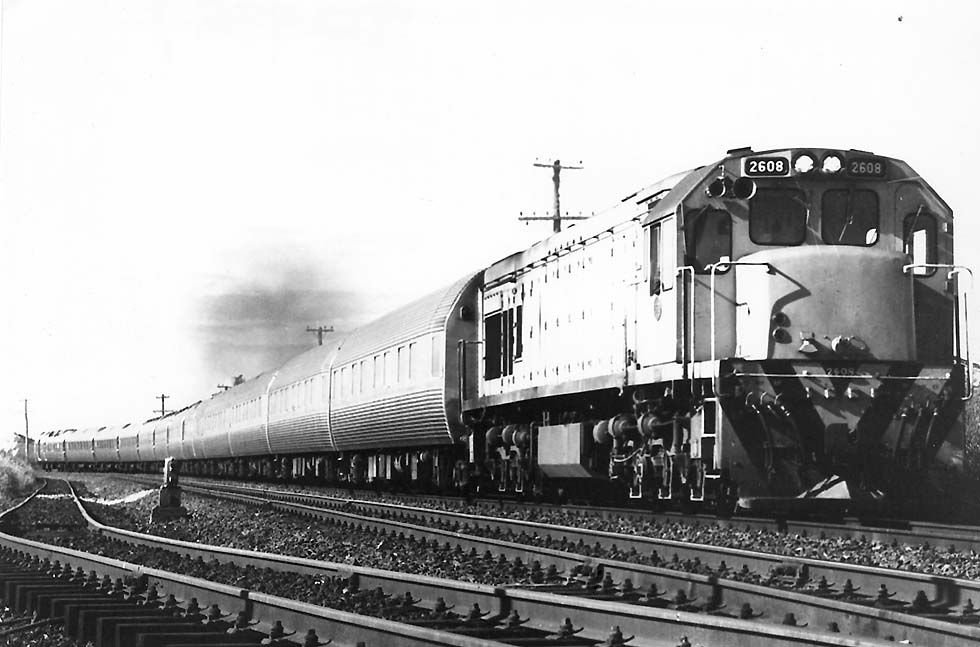
Popsicle Dixie from a Frateschi U20C a Phase II departing Wellington on the Palmerston North "Oil Train" in the late 1970s. Photo by Ken Devlin via the KiwiBonds site. The Popsicles looked even better at the head of the stainless steel coaches on the Silver Star Express. . .
 Probably a staged shot, as the Generator Car is normally hauled directly behind the locomotive and spoils the "proper" look! - NZR Publicity Deptartment photo. Click on image for a larger version.
 Dx2616, a Phase 2, arriving at Welington some time between 1975 and June 1979. Love the perfect colouring and colour saturation, and the reflection of the Dx's rear on the front of the generator car. Very very yummy. Thank you Joe Wallace, he has many nice photos on Flickr in his Jokertrekker photostream Again, click on the photo for a larger image.
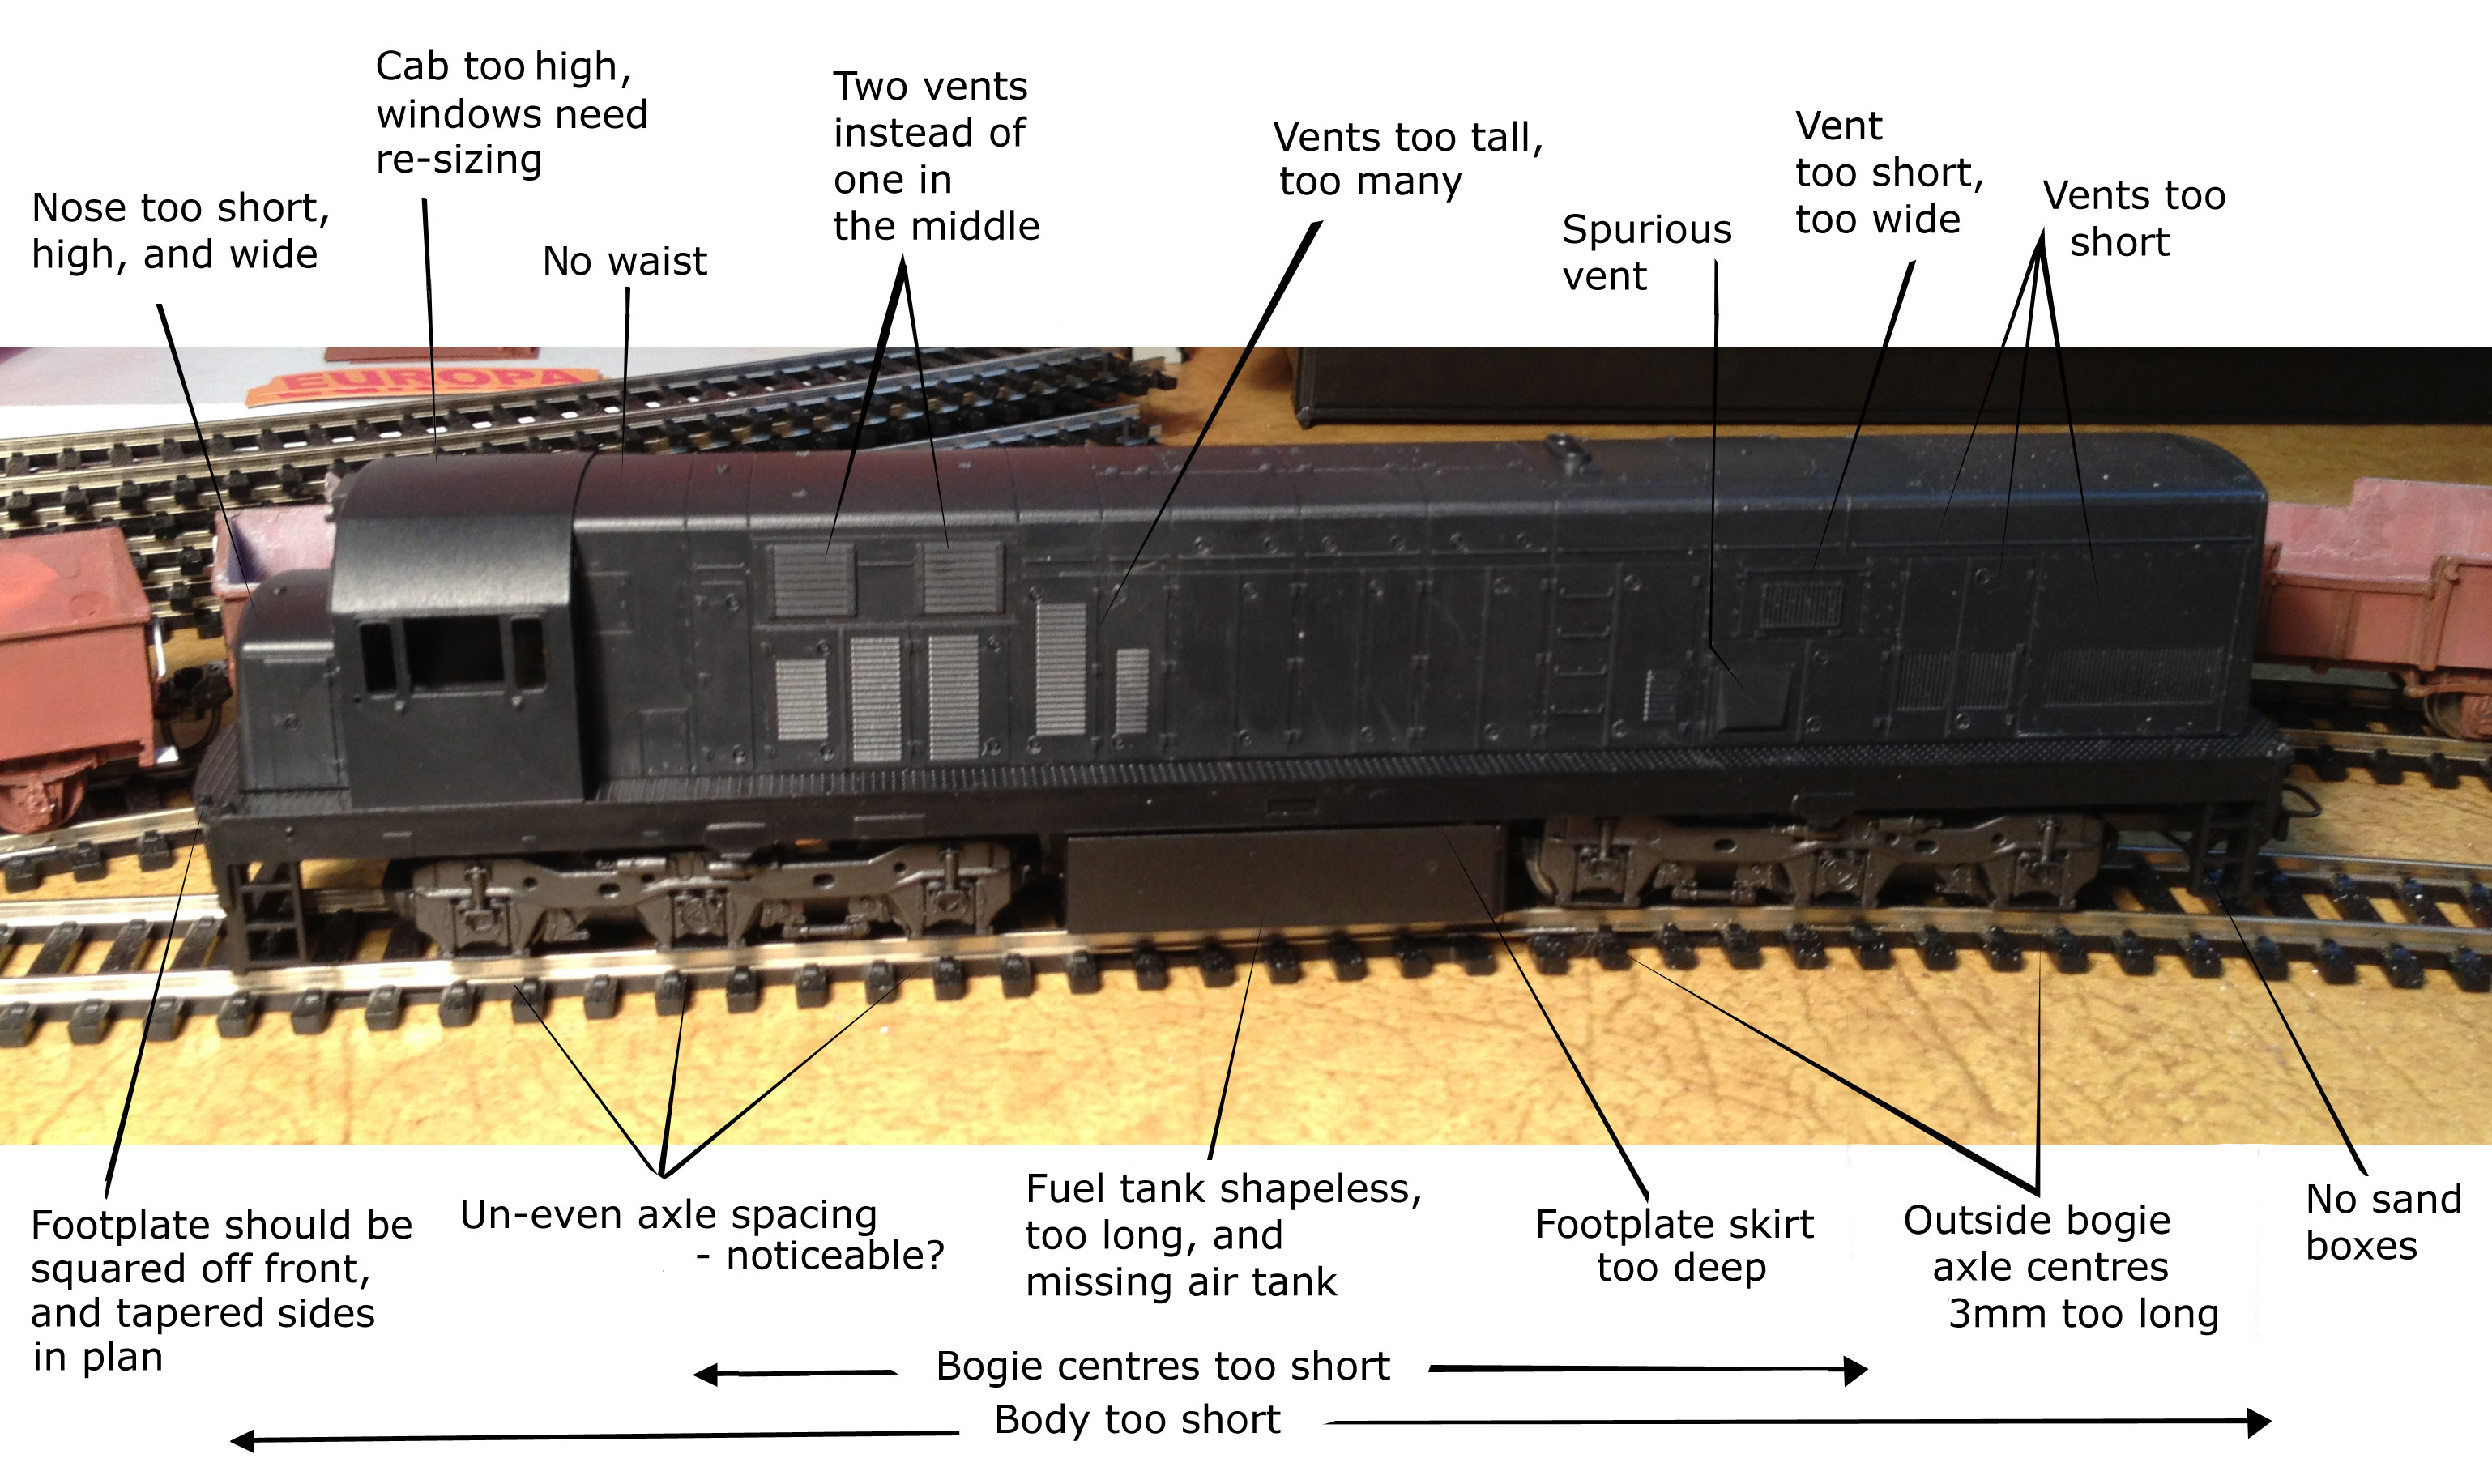
Modelling the NZR Dx in OO The Frateschi "Dx" is another of their look-alikes that's reasonably close, more phase II than phase I, and with a bit of work you can make it look even better, and capture that proper look of our own NZR Dixie.
What needs doing then?
Chassis Wonder if they were trying to model another Dixie characteristic in the fact that the bogie bolster pivots are a bit (scale 1.3mm) "outboard" of the centre axles' centres? Bogie wheelbase total (outboard axle centre to inboard axle centre) is 3mm too big. The bogie frames need the outboard ends trimmed off and the inboard ends need that "tail". Bogie centres measurement is about 10mm too short - needs to be lengthened. The fuel tank needs some shaping, and shortening by 4mm and then an added air tank. The footplate skirt looks too deep, and sand boxes (and pipes if you are keen!) are needed on all four corners. And speaking of which, the footplate ends need squaring off
at the headstock, and given a slight taper in planform
Body The nose also needs the handbrake housing on its port side. There needs to be a slight waist immediately behind the cab
a la Da, where the longhood narrows to be same width As a result of these cab changes, the windows will need fettling. On top of all that the body needs lengthening by 15mm to match the increased bogie centres mentioned above - looks like somewhere along the long hood. Will have to study more and work that one out. It really does need this to get the real front and rear overhang characteristic of our Dx. Side panels and vents need fiddling if you're a rivet counter; probably a bit even if you are not!. And a nicer headstock wouldn't go amiss, and the moulded-on hand grabs on the long hood sides and ends can be removed and replaced with wire. Likewise the supplied plastic handrails are far too thick and should be replaced.
In summary
 Click on image for a more detailed view.
So biggest differences then really are the cab and nose area and the fuel tank re-sizing to make way for an air tank. Oh, and sand boxes. Just sorting that lot would go a long way for a start.
 on Phase I Popsicle Dxs 2612 and 2602 at Westfield some time between 1972 and 1980-ish. The lighting also shows very well the waist (narrowing of the long hood) immediately aft of the cab on the loco closest to camera.
References
More to follow.
|