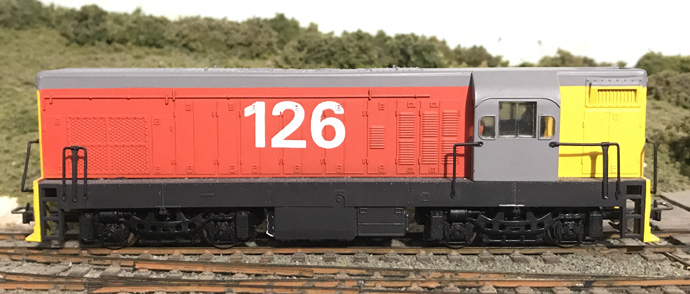
NZR Da from a Frateschi G-12
The NZR Da class locomotive was to me the sight, smell, and sound of railways when I was growing up in the sixties. Much like older peoples grew up with the sight, smell, and sound of those hissy things. The Da was everywhere - on local goods shunts, on the Scenic Daylight and overnight expresses between Wellington and Auckland, and on subbies. Even the most beautiful Silver Star express in its early days. They were just everywhere.
What needs doing then? Over the years, Frateschi have released three NZR versions that I know of - Bo-Bo (four-axle) in Fruit Salad A1A-A1A (six-axle) in Fruit Salad A1A-A1A (six-axle) in classic red.
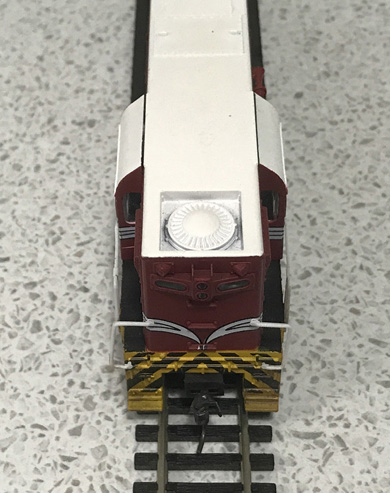
 (pic from Iron Horse Hobbies).
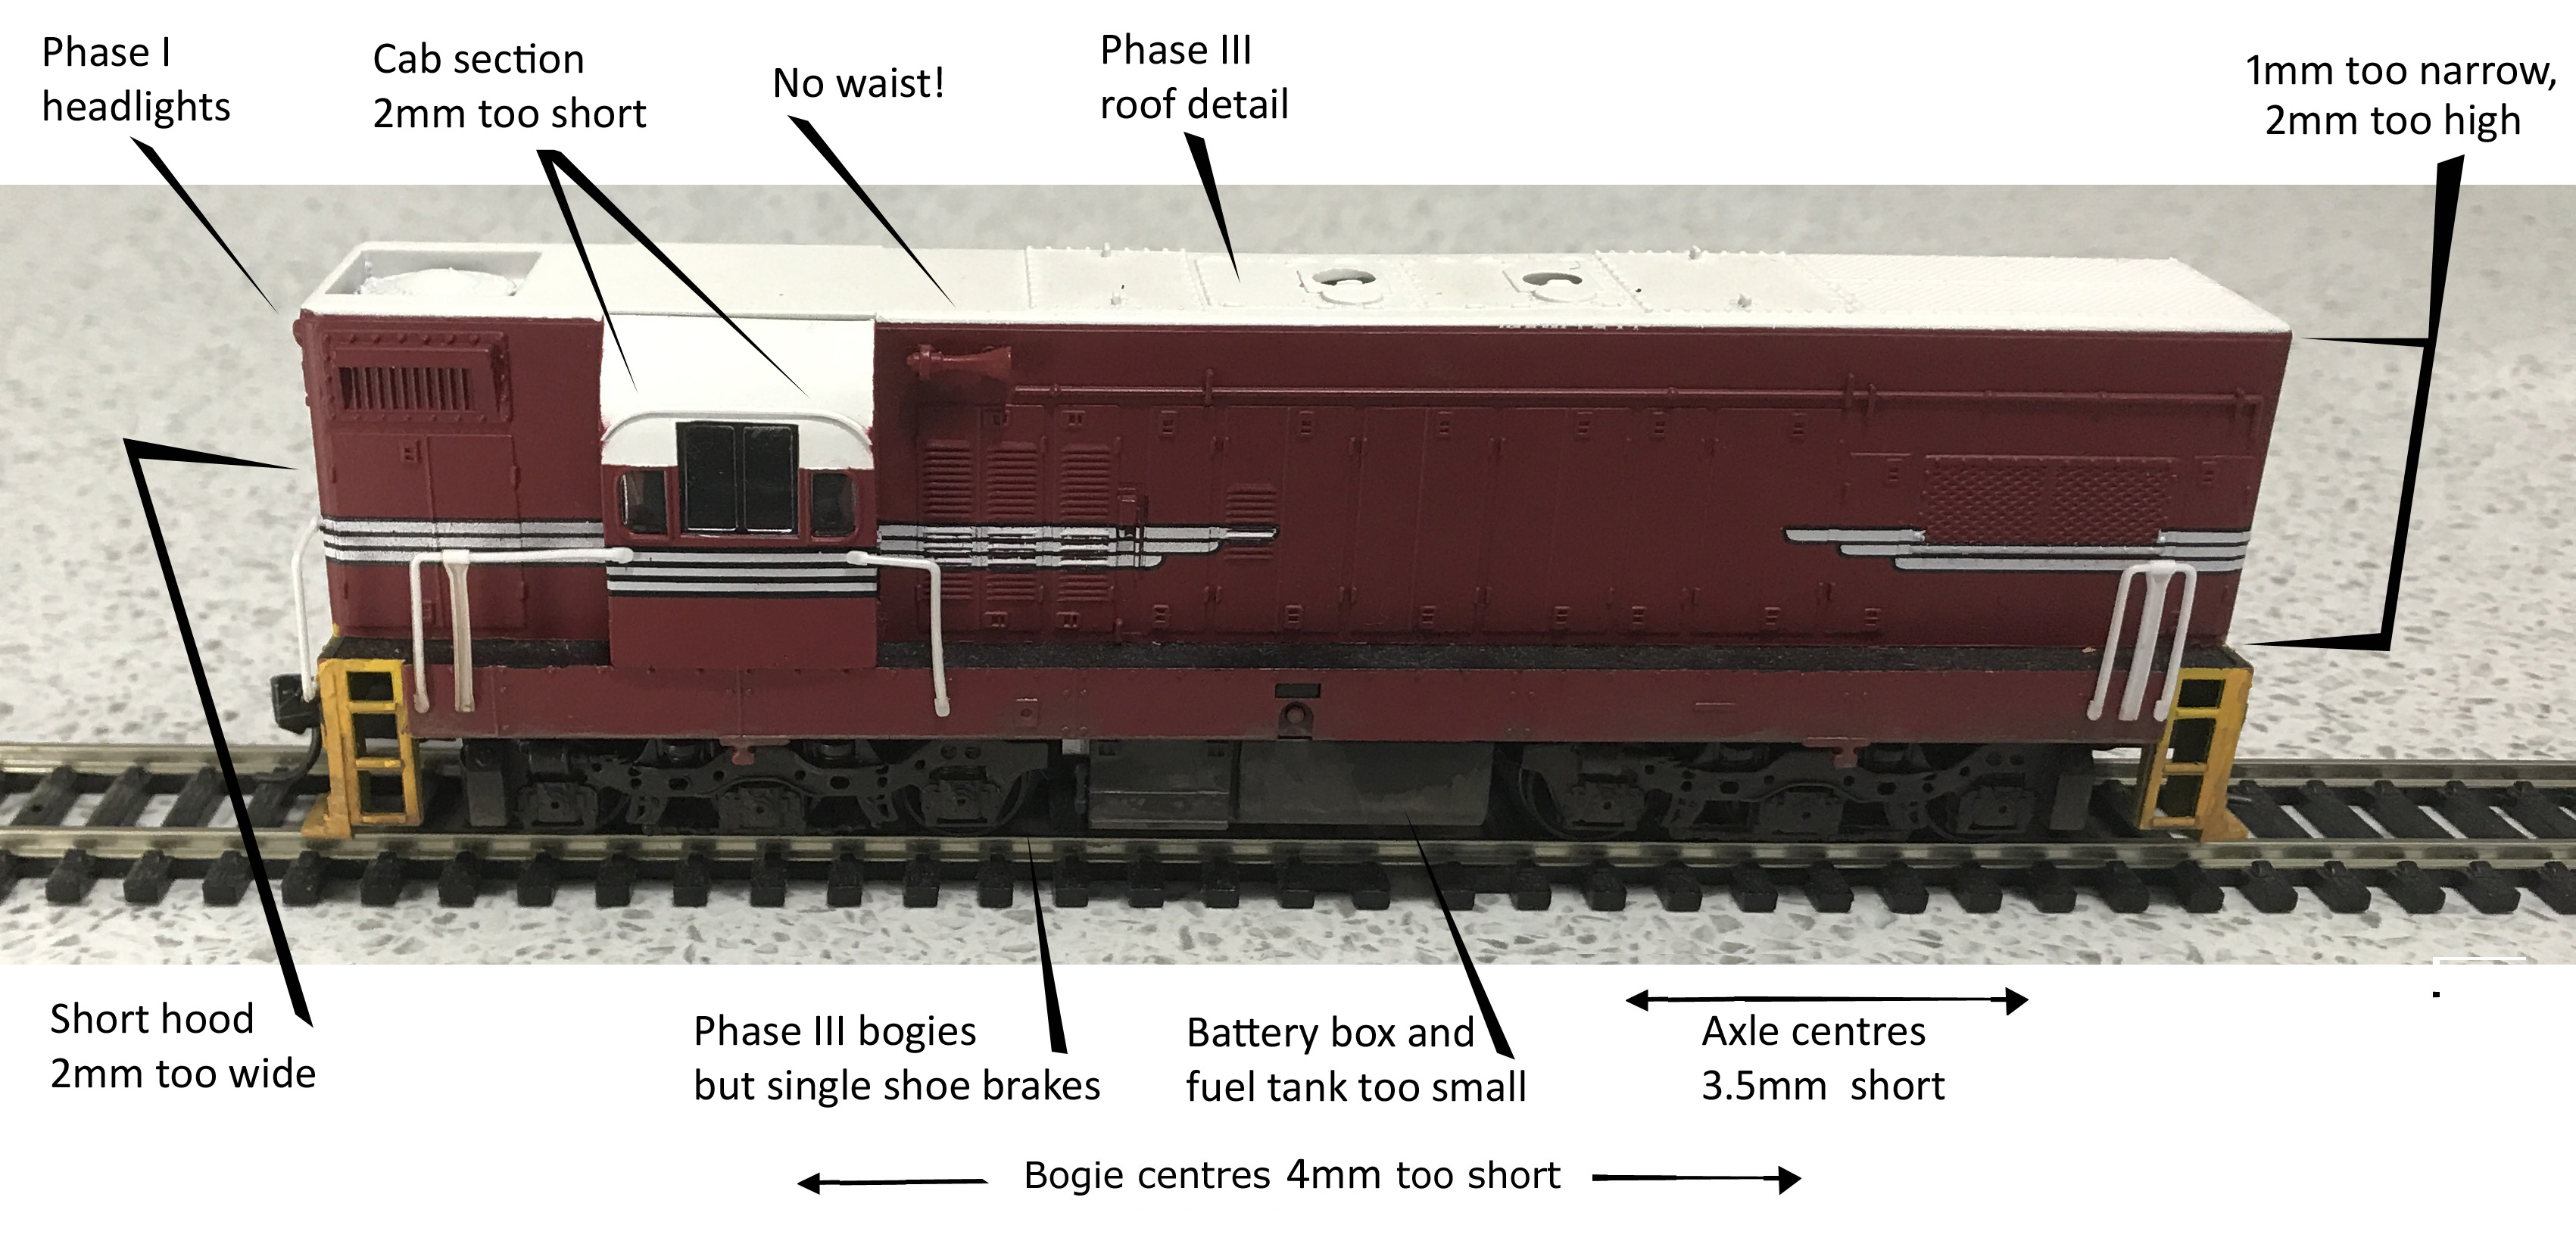
 Ok, I haven't started this project yet - other than purchasing a couple of extra bodies that are sold separately - so much of the following can be argued and will update as I gain more info and feedback from fellow modellers. But the following is based on my many years of real life observation (ah, the sounds and smells!), research, and also many drawings and a multitude of photographs. And staring endlessly at the model from all angles. In the end, I don't want to be a rivet counter, but have found that with models, getting most if not all of the measurements at least correct or close, greatly helps in getting the correct overall look. And that's my ultimate goal. In searching for accurate drawings of our NZGR Da, none appeared accurate in all areas, and especially in the all-important area of the Da's characteristic 'waist' behind the cab. That is where the long hood has a two-panel tapering section immediately aft of the cab to match the narrower shorthood. Luckily I found an NZRLS drawing of the the lighter version Db class. This does show the correct 'waist'. Just watch it though - the Db body is a smidgen lower and narrower than the Da, to fit smaller loading gauges on branch lines. So, looking at drawings of a Da and Db, and based on body length and a few other base measurements, I estimate this model to be approximately averaging(!) 1/77th scale - pretty close to OO scale's 1/76th then. It's probably best to decide on one particular Da you want to represent, hunt down as many photos as you can of it, and then apply those changes to the Frateschi, because over the years, like any other modelling subject like this, there were many differences even within the same sub types. With the Da, bogie types and roof detail are a good example of this.
Chassis The bogie outside axle centres measures 3.5mm too short. The bogie pivot centres measure 4mm too short. The driving wheels are ~1mm too small, not noticeable, while the idlers are pretty much spot on. The fueltank and batterybox between the bogies need enlarging vertically (dropping) by ~2mm Oh, and the footplate is exactly spot on height from rail level! Not tooooo bad over all
Body Overall the body measures ~2mm too high from the footplate, and is ~2mm too short. Doesn't sound much but it does contribute to the overall too-short, too-tall look of this Frateschi. The footplate skirt is perfect height. The most obvious inaccuracy, and the one that annoys me the most, is in the long and short hoods being the same width. The longhood should be fatter with a tapering section aft of the cab, and the short hood should be slimmer.
  Body length   Body height Body width To acheive the correct hood plan shapes, the short hood back to the aft edge of the cab needs narrowing by about 3mm, and the long hood widening 1mm or so, aft of the two vent panels aft of the rear cab edge. To summerise, both longhood and shorthood are 23mm wide. Shorthood needs narrowing by 2mm = 1mm each side Once done, the longhood needs a bevel so the top edge lines up with the top edge of the short hood - see waist photos for reference. Cab front and rear panels (doors and their windows) need fettling to fit the resulting narrower shorthood and narrow section of the long hood.
Asthetics A nicer headstock wouldn't go amiss along with correct cow catcher. The moulded-on hand grabs can be removed and replaced with wire. Likewise the supplied plastic handrails are too thick and should be replaced with wire.
In summary Refer to as many photos as you can find and use them as a guide.
 Click on image for a larger view. References
More to follow once reconstruction begins.
|